Giving code presentations

I sometimes give talks at the local tech hub in the city where I live. It's not a big community, but I enjoy giving talks and they often provide a necessary deadline and motivation to finish some projects.
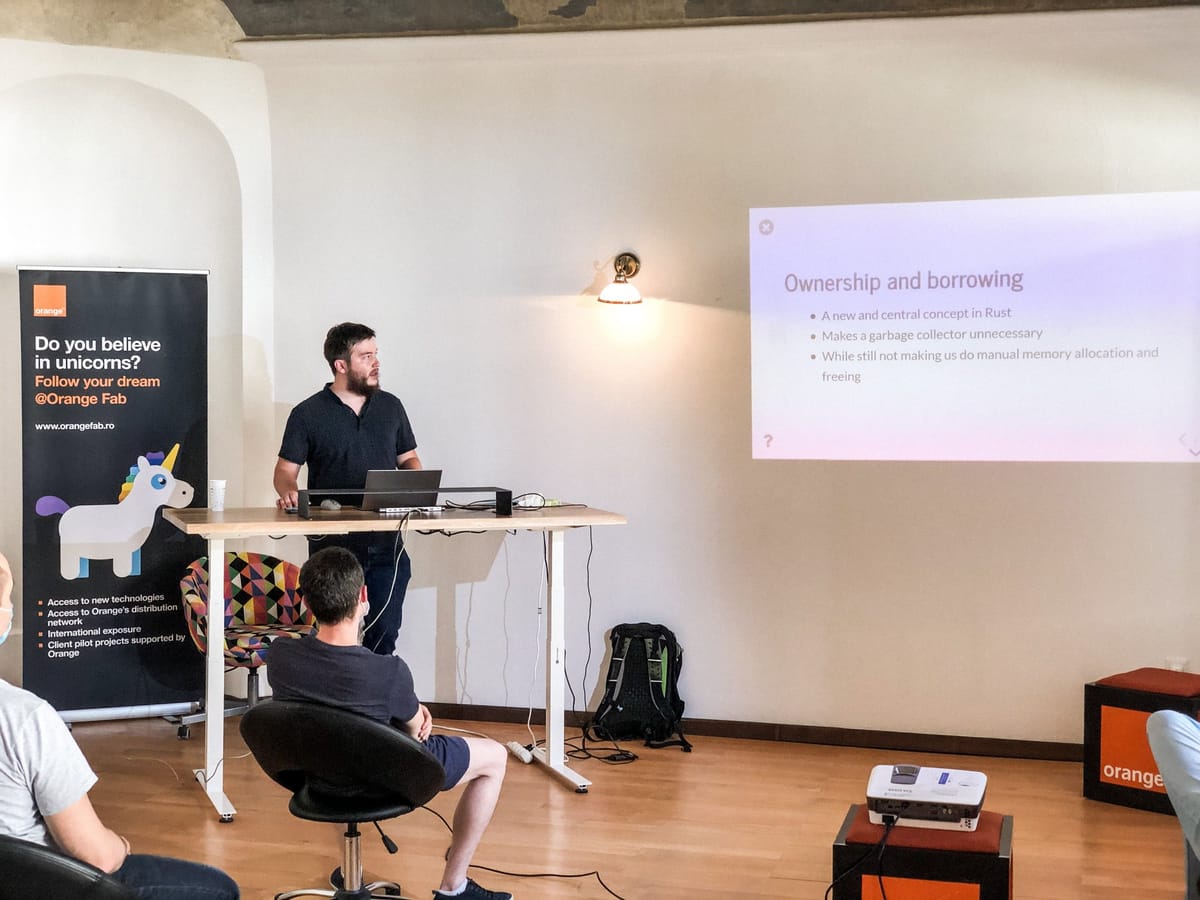
Last week I gave a talk about Rust. Given that there are still some restrictions on how many people get be in one room, the physical audience was only 10 people, but there was a livestream as well.
Until now, I had used Google Slides for my presentation. For talks that don't have a lot of code, it works fine. But when you are presenting lots of code (such as a tutorial for a programming language), I found Slides to be lacking. If you paste in the code directly, you can't have syntax highlighting. You can paste in a screenshot, but then any later modifications to the slide mean retaking the screenshot and replacing it, so it's more work.
You can present in an IDE, but sometimes you want to have slides with normal text between pieces of code, where you explain some things. Switching between two apps can quickly get annoying. Also, it's hard to prepare just "bite-sized" content in an IDE, but that is needed so that the audience is focused only on what you are explaining right now.
So I decided to try something new for my intro to Rust presentation: I used Jupyter Notebook with a several extensions and I think it worked pretty well (except for a bug towards the end of the presentation).
For this I used the RISE extension, which adds live slide show support to Jupyter, using reveal.js. Each cell can be either a new slide, a sub-slide (so to get to it you have to "navigate down", in reveal.js style), a fragment (so it shows up on the same slide, but on a subsequent click), or notes. You can write new code and run it even during slideshow mode, so it's very useful if someone in the audience has a question, you can quickly write down and execute code to answer them. RISE is simple to install:
> pip install RISE
Then I used a bunch of extenstions that are bundled together in the jupyter_contrib_nbextensions package. By default, you have to enable and configure them by editing JSON files, but there is another plugin to add a dashboard for them, called jupyter_nbextensions_configurator. They can be installed with:
> pip install jupyter_contrib_nbextensions
> jupyter contrib nbextension install --user
> pip install jupyter_nbextensions_configurator
> jupyter nbextensions_configurator enable --user
You have to restart the Jupyter process and now you will see a new tab on the home page of the local Jupyter page, where you can enable and configure all the installed extensions.
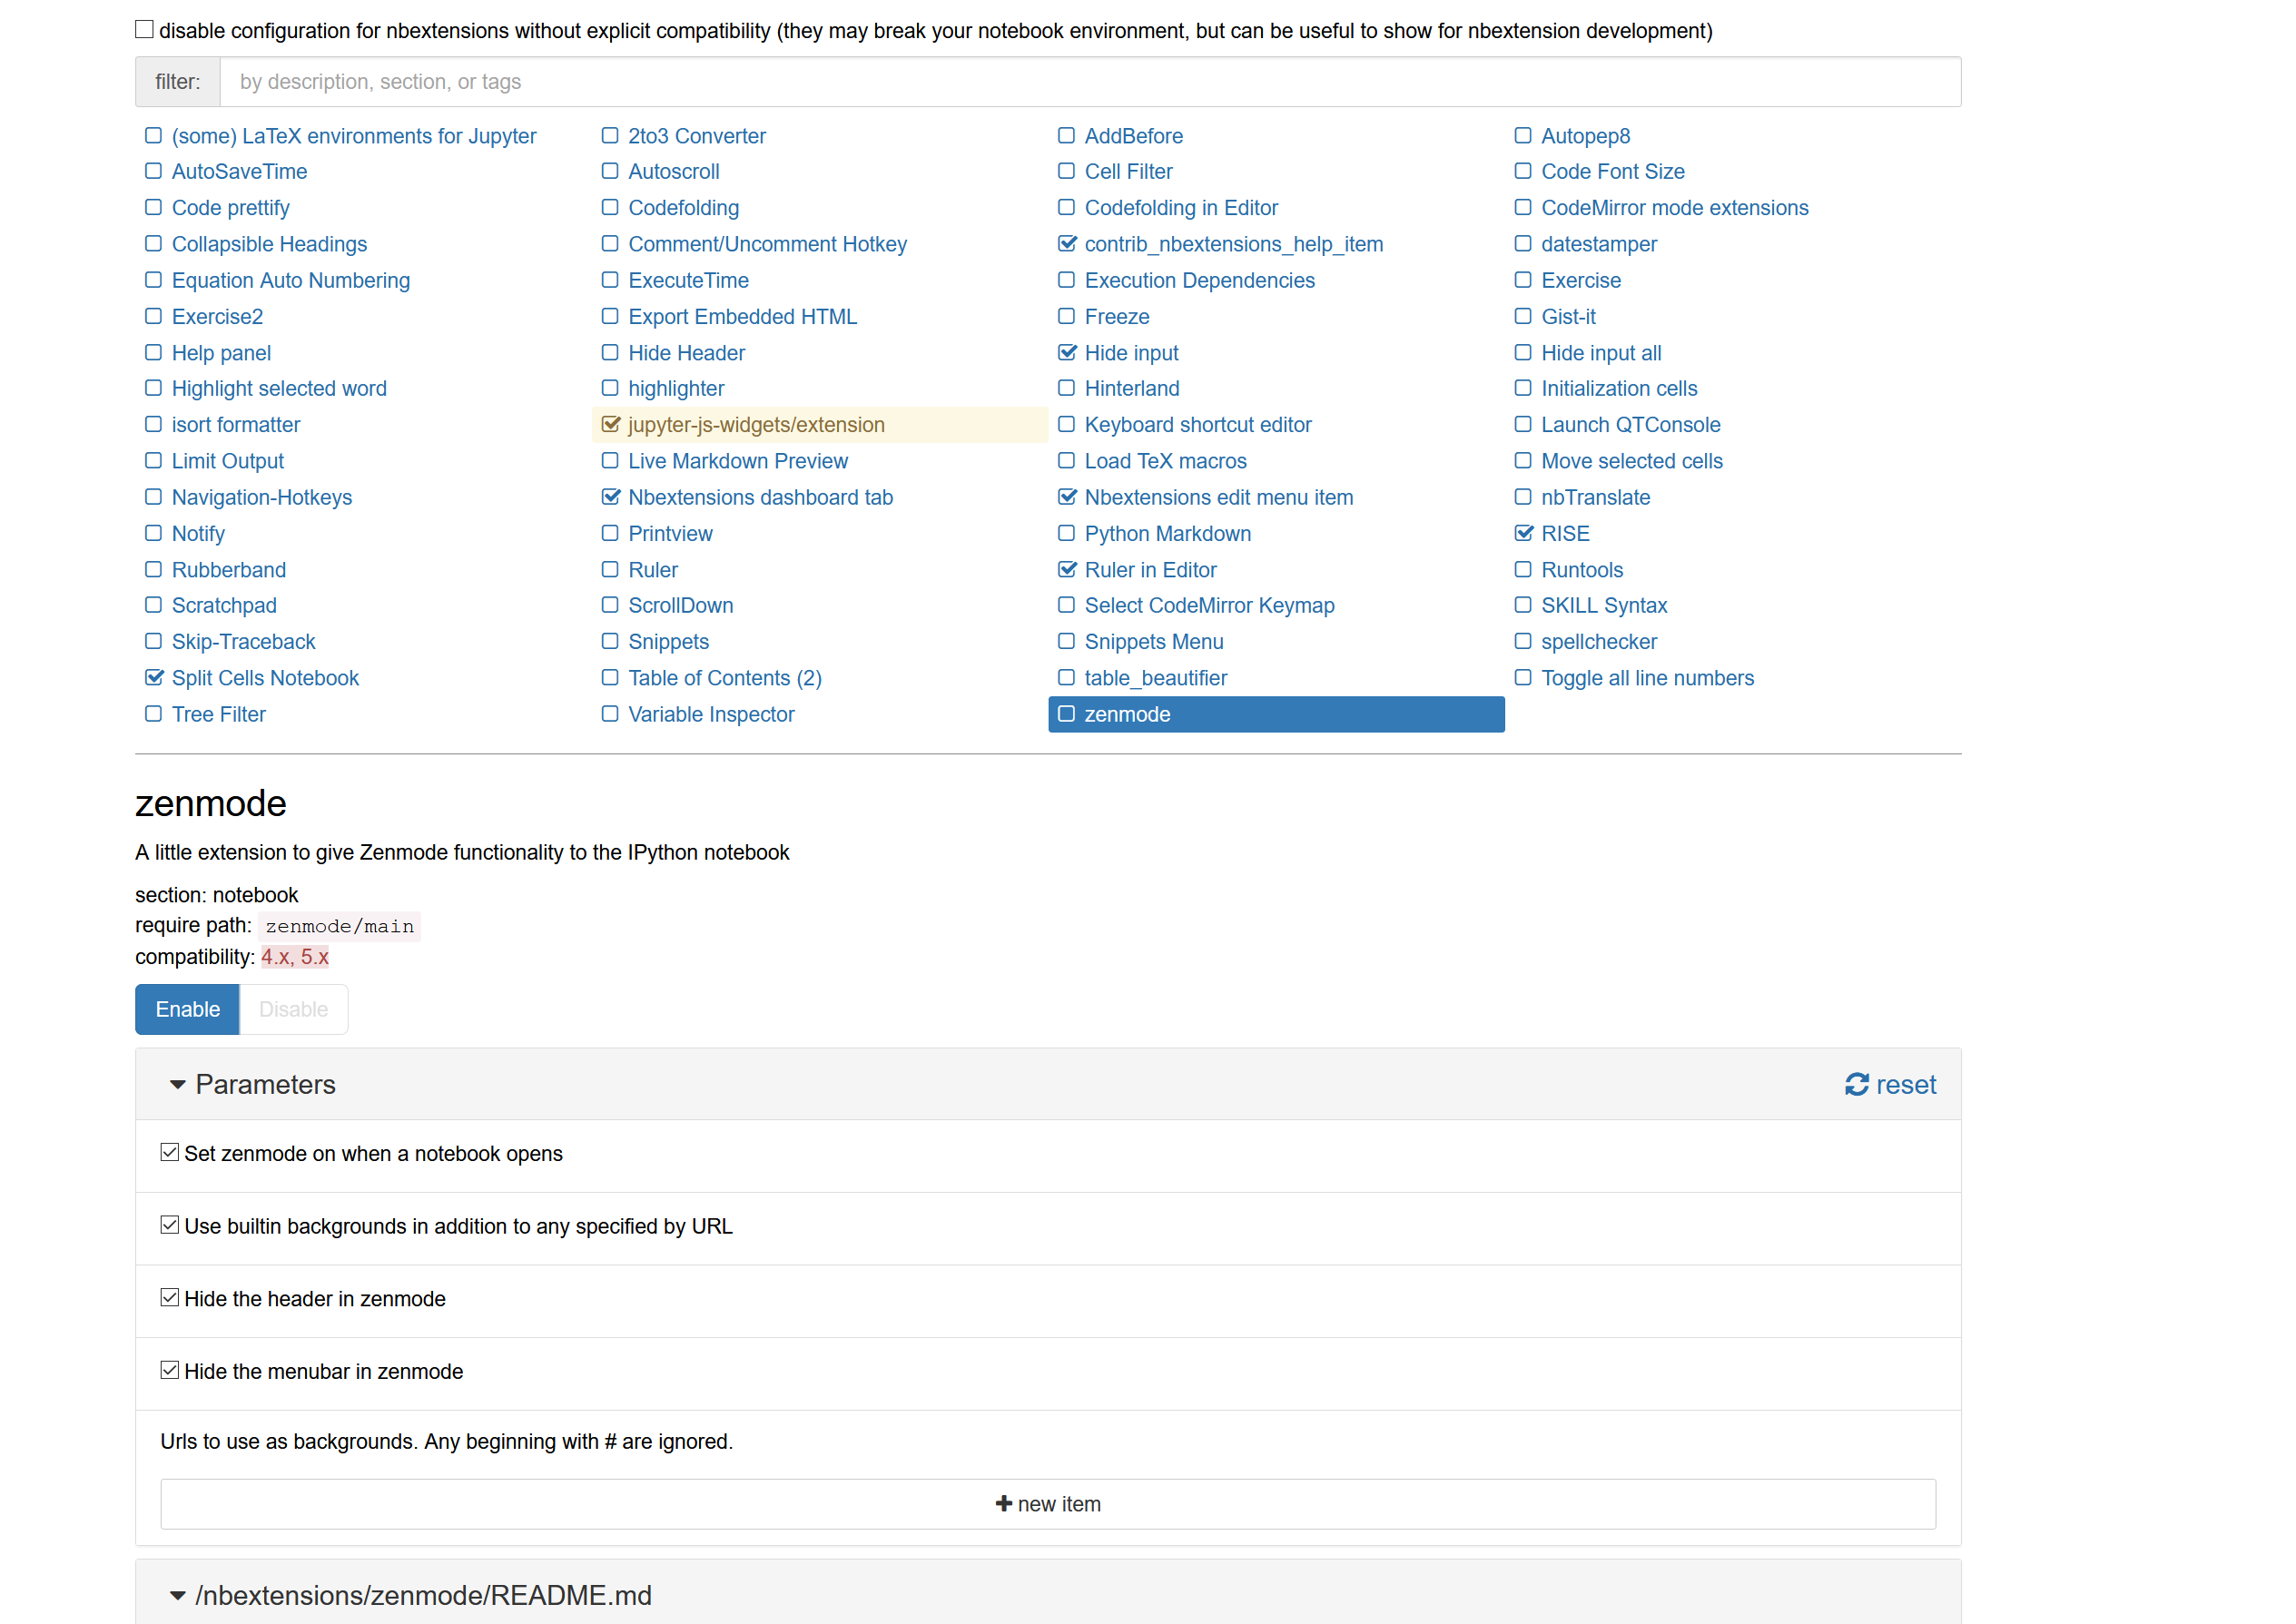
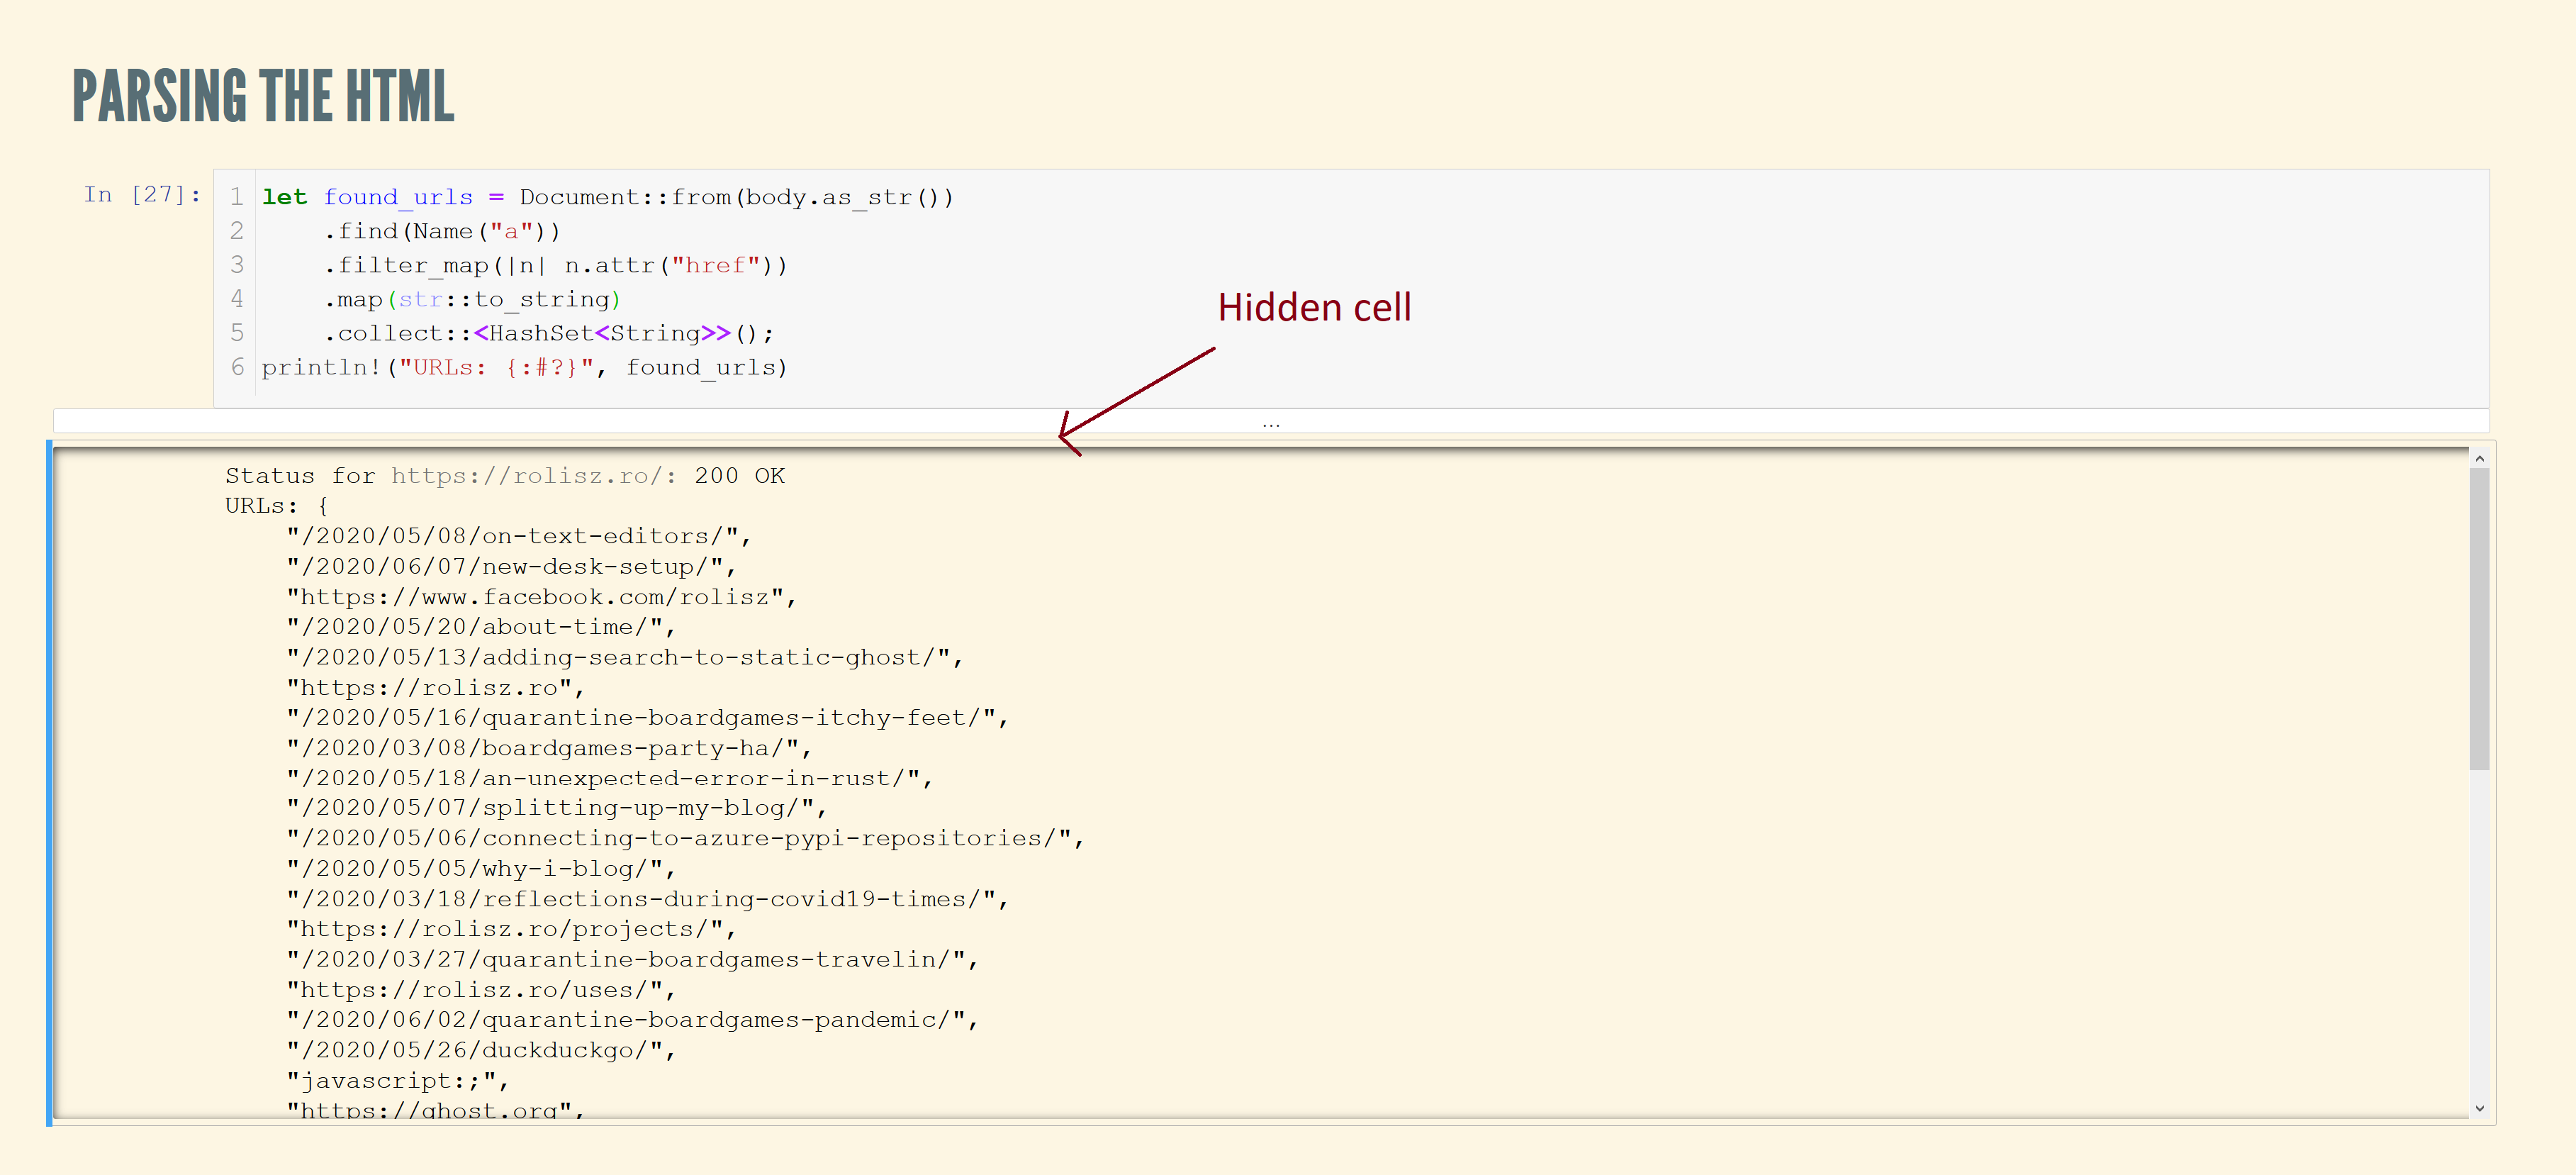
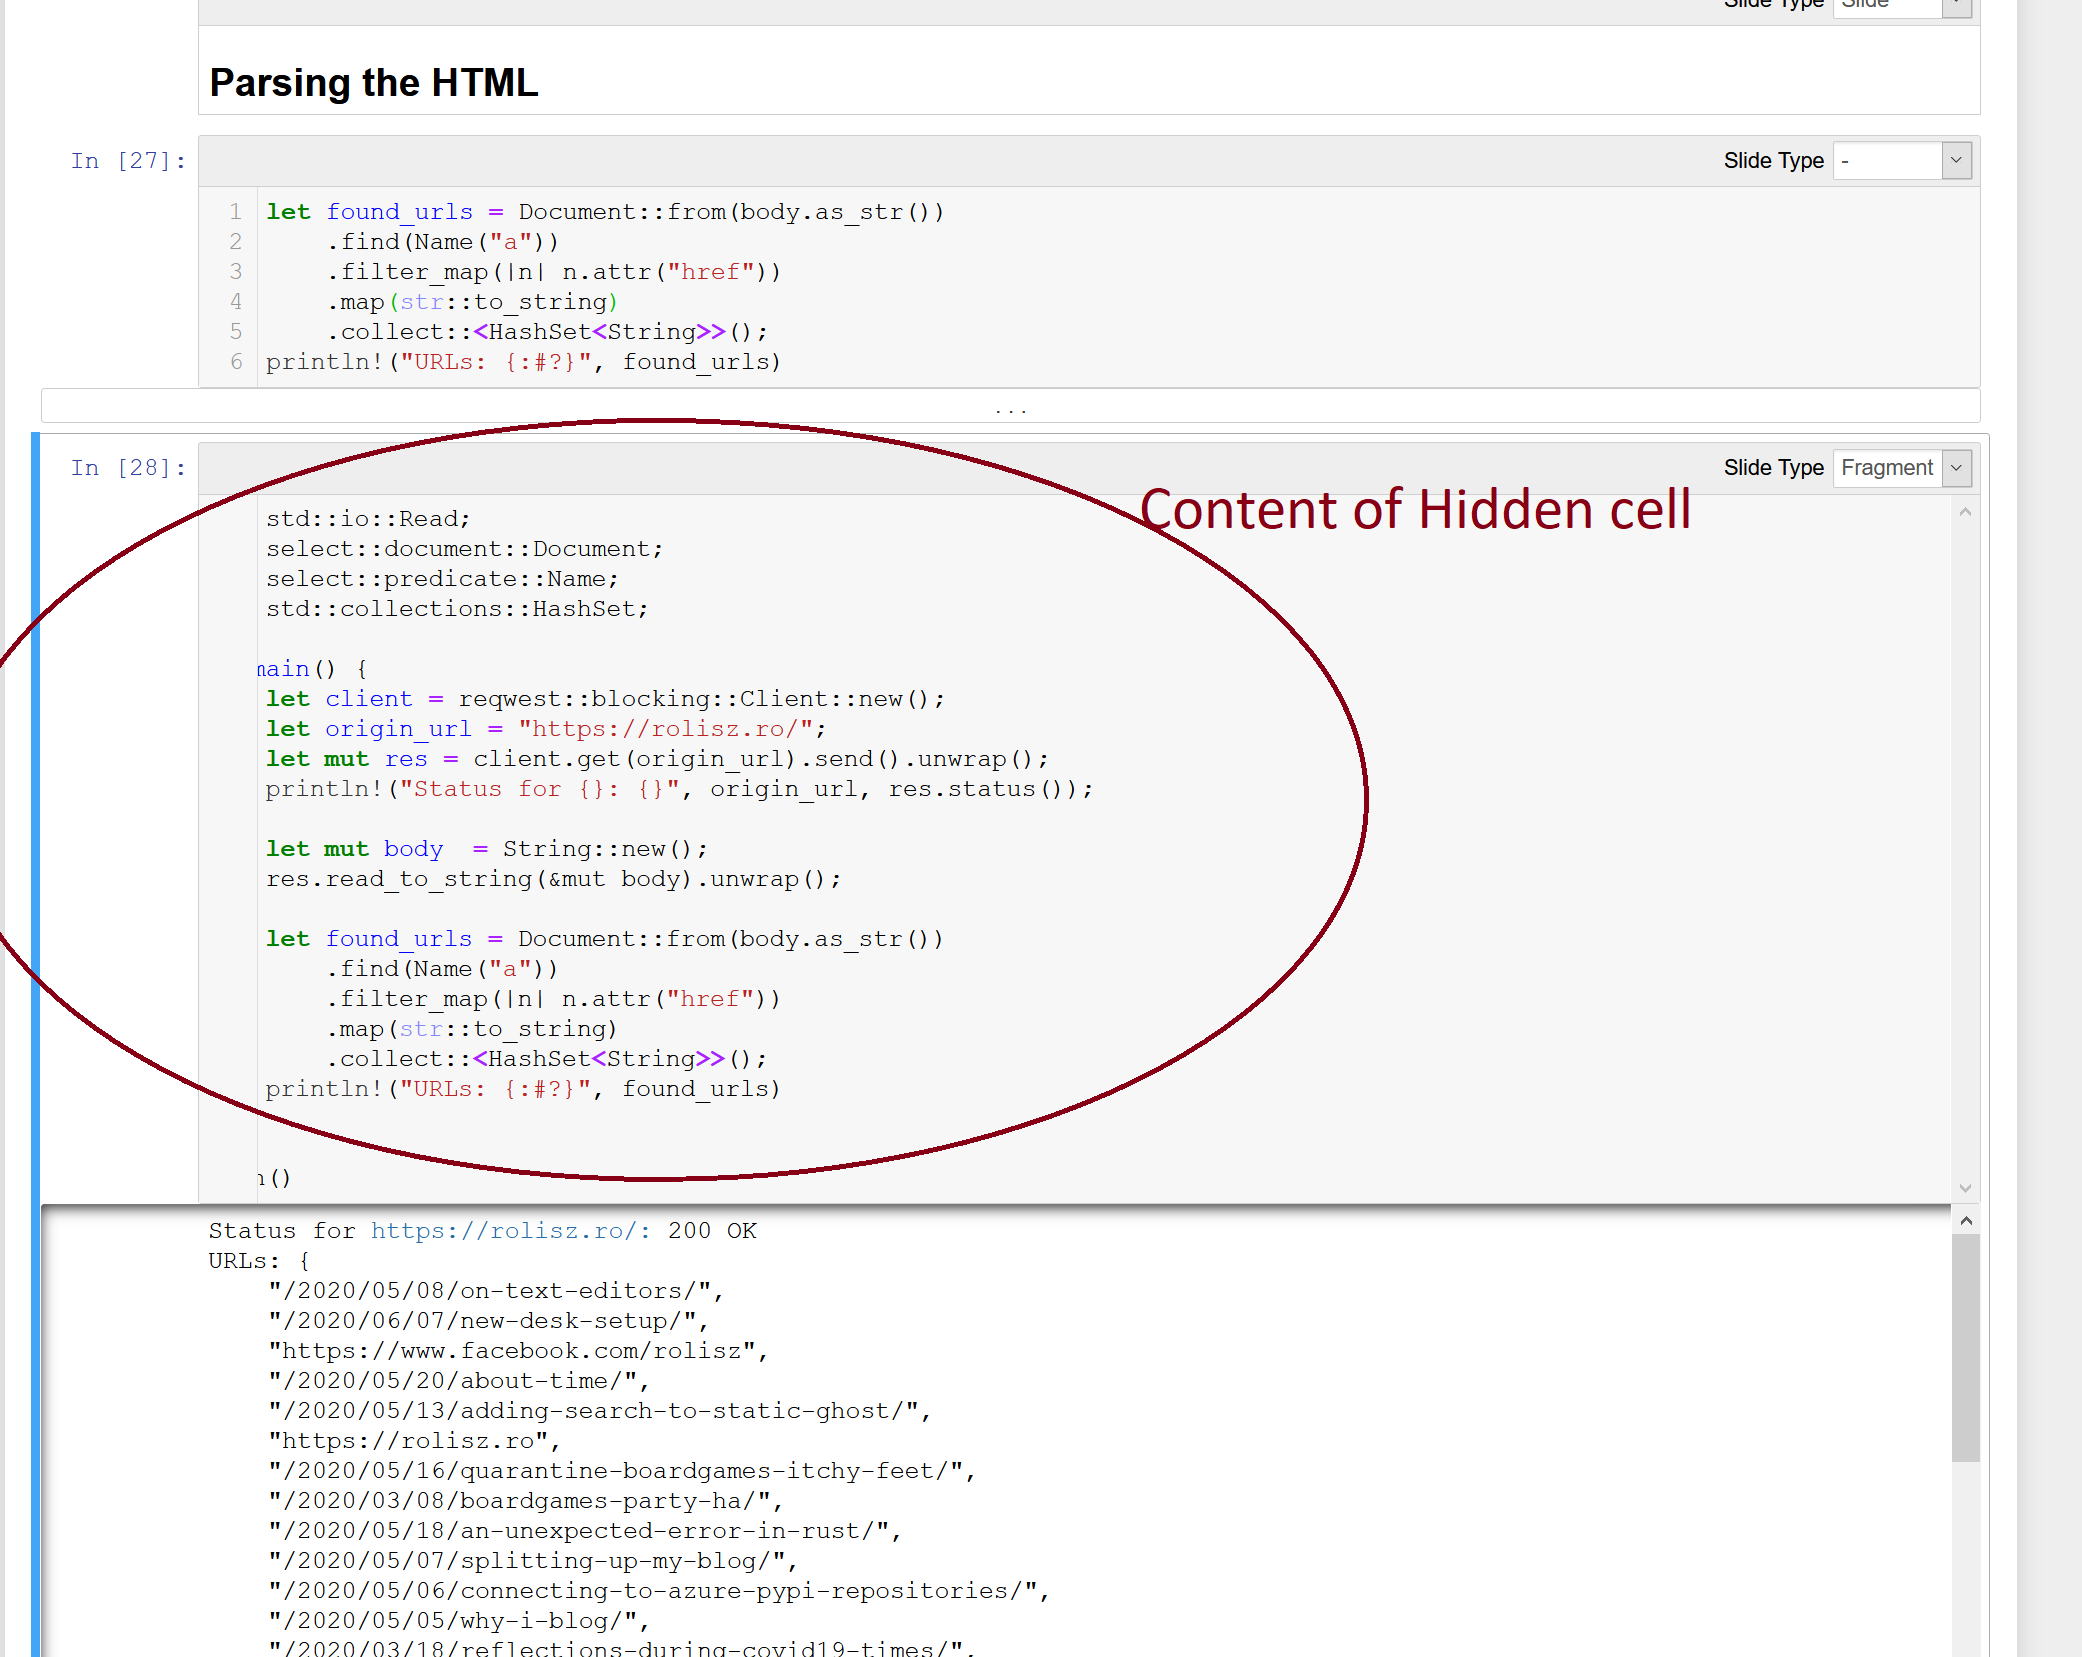
I used the "Hide input" extension. Most of my code was organized into two cells. One which didn't contain all the code, just a snippet on which I wanted to focus (for example, I made a small change to a previously defined function), and another one which could be run and showed output. The latter cell was hidden with this extension, so that only the output could be seen.
Initially I also used the "Split cell" extension. This extension gives you a button which can make a cell to be half width. If two consecutive cells are half width, they align next to each other, making two columns. I wanted to use this to have code on the left column and explanations on the right column. This would have worked if the presentation was online only, because I wouldn't have had to zoom in too much. But because in the last week before the presentation we found out that it was allowed to hold the presentation in person (with 10 people in the audience) and I had to present on a projector and zoom in, I ended up removing all the split cells because the content wouldn't fit in any longer.
Making Rust work with Jupyter
All the above is generic and can be made to work with anything that works in Jupyter. To make Rust work in Jupyter you need a kernel for it. Some guys from Google have made one called evcxr_jupyter.
It's fairly straightforward to install. On Windows you need to first install CMake and then you run:
> cargo install evcxr_jupyter
> evcxr_jupyter --install
After restarting the Jupyter process, you now have the option of using a Rust kernel. To include Cargo dependencies, you can insert the following into a cell:
:dep reqwest = { version = "0.10", features = ["json", "blocking"] }This downloads reqwest , compiles it and makes it available for using in other cells.
The notebook for presentation that I gave can be found in a Github repo and the recording can be found here.
I’m publishing this as part of 100 Days To Offload - Day 27.